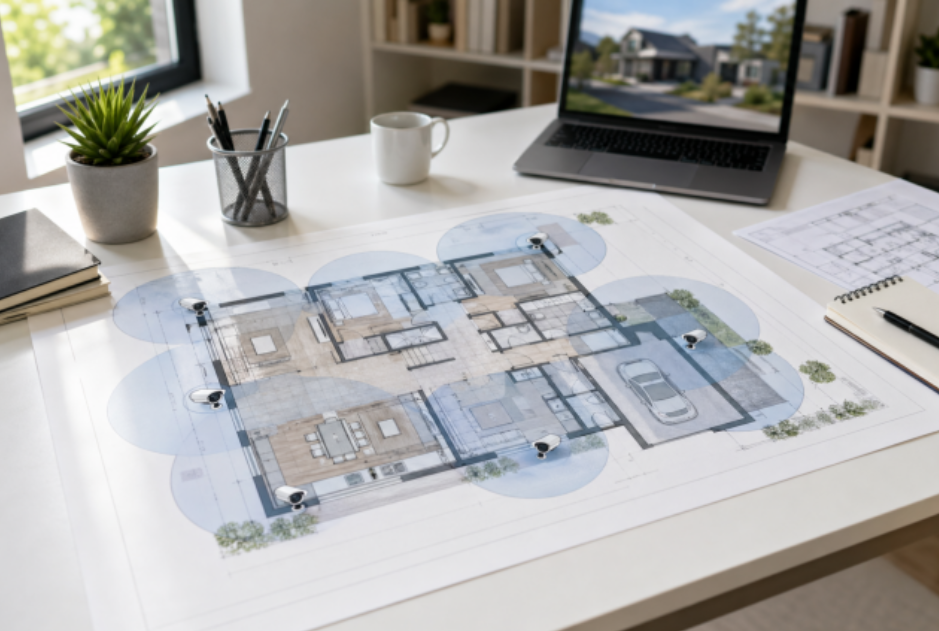
Floor plan on a desk mapping home security camera coverage zones in a bright clean room
Most people shop for home security cameras backwards. They compare specs first, then discover blind spots after installation. A better approach is to map coverage zones first, then decide camera type and count. If you do that, your home security camera system becomes simpler, cheaper, and easier to maintain.
This guide walks through a planning-first method you can use in one evening with a floor plan, a pen, and a realistic view of how your household moves through the day.
Table of Contents
• Start with movement, not with camera specs
• Build a zone map before device count
• Plan an indoor and outdoor security camera setup as a system
• Check line of sight overlaps with the doorbell and smart lock
• Pre-plan bandwidth and storage before final purchase
• A simple planning formula for camera count
• Match each zone to the right camera behavior
• Common planning mistakes to avoid before you buy
• Example planning blueprint for a typical home
• Conclusion
Start with movement, not with camera specs
Before you compare image quality or night vision, map your family’s real movement paths. Think in terms of “decision moments” where video actually helps:
• A person approaches your front door
• A car enters or leaves the driveway
• Someone crosses the backyard gate
• Activity happens in key indoor transition spaces
If a planned camera view does not answer one of those moments, it is probably unnecessary.
A practical order of priority for most homes:
1. Primary entry points (front door, side door, back door)
2. Vehicle access (driveway, garage entrance)
3. Perimeter transitions (gates, backyard paths)
4. Indoor choke points (entry hall, main living zone, stair landing)
5. Low-risk convenience views (playroom, storage corners)
That priority list helps you avoid overbuying indoor devices while missing outdoor risk zones.
Build a zone map before device count
Use a simple “zone card” for each area. You only need five fields:
• Zone name: Front porch, driveway, backyard gate, living room
• Main objective: Identify faces, detect movement direction, monitor package area
• Lighting profile: Daylight only, mixed light, low light at night
• Coverage shape: Narrow corridor, wide open area, long-depth view
• Recording need: Event clips only or longer continuous capture windows
Once you fill these cards, camera count becomes obvious. Example:
• Front porch usually needs one focused angle for visitor/package interaction.
• A wide driveway often needs one overview angle plus one detail angle near the vehicle approach path.
• Backyard spaces may need one camera for gate crossing and another for patio activity if those areas do not overlap clearly.
This is where many “best home security cameras” lists fall short. They rank devices, but they rarely show how one home often needs mixed view types, not one model repeated everywhere.
Plan an indoor and outdoor security camera setup as a system
A strong indoor-outdoor security camera setup treats exterior and interior cameras as different jobs.
Outdoor camera roles:
• Detect approach before entry
• Capture route of travel across boundary lines
• Support plate or clothing recognition context where distance allows
Indoor camera roles:
• Confirm what happened after a boundary breach
• Track movement through high-traffic transitions
• Protect key interior assets without placing cameras in private areas
A common mistake is installing too many indoor units while leaving yard transitions under-covered. In planning terms, outdoor cameras should usually carry the first detection burden, with indoor cameras providing continuity and context.
If you are comparing categories, start with eufy’s camera hubs instead of single-device comparison so you can match camera types to zones first: Security Camera Collection. For external placement ideas and weather-focused options, use: Outdoor Security Cameras Collection.
Check line of sight overlaps with the doorbell and smart lock
You do not need a complex smart-home diagram here. Just do a quick alignment check:
• Doorbell view should capture a face-level approach at the doorstep
• The main entry camera should capture the approach path before the doorbell’s field of view
• Smart lock event timing should be visually explainable by at least one camera angle
In plain terms, if a lock opens unexpectedly, you want video showing who approached, from where, and what happened immediately before unlock. That usually needs two complementary views near the main entrance zone, not one ultra-wide angle alone.
Pre-plan bandwidth and storage before final purchase
Many camera plans fail at the network stage, not at the mounting stage.
Before purchase, estimate:
• Number of cameras expected in 6 to 12 months (not just day one)
• Peak simultaneous activity periods (evening arrivals, delivery windows)
• Recording mode by zone (event-heavy outdoor vs occasional indoor)
• Retention expectation (for example, 14/30/60/90 days)
Then decide your practical storage strategy:
• Event-first retention for low-priority zones
• Longer retention for entry and driveway evidence zones
• A clear policy for clip export when incidents happen
Also reserve network headroom. If your plan is exactly at your current bandwidth comfort line, it will feel unstable when firmware updates, streaming, and household traffic overlap.
A simple planning formula for camera count
Use this formula as a first-pass estimator:
Camera count = Critical zones + split-angle zones + continuity zones
• Critical zones: front door, back door, driveway, gate transitions
• Split-angle zones: places where one lens cannot cover both the overview and the detail
• Continuity zones: indoor transition points that explain post-entry movement
For many single-family homes, this lands between 4 and 8 total cameras when planned correctly. The exact number matters less than whether each camera has a clear “decision purpose.”
Match each zone to the right camera behavior
After you estimate count, the next step is behavior matching. Different zones need different camera behavior, even when they use the same brand ecosystem.
For entry-facing zones, prioritize stable face-level framing over extreme-wide views. A very wide angle may look impressive, but it can reduce useful detail where identification matters most. For driveway and curb-facing zones, prioritize motion continuity and angle overlap so a moving subject is not lost between frames or between devices.
For backyard and side-yard transitions, detection reliability usually matters more than cinematic image quality. These areas often have mixed shadows, fence movement, and seasonal lighting changes, so your setup should tolerate real-world noise. Indoors, choose positions that explain movement flow rather than trying to watch every corner. One well-placed transition camera can provide better incident context than two redundant static angles.
A practical planning habit is to tag each zone with one primary mode:
• Identify mode for face and clothing detail at approach points
• Track mode for movement direction across open spaces
• Context mode for indoor continuity after entry events
When each camera has one dominant mode, your home security camera system is easier to tune and maintain.
Common planning mistakes to avoid before you buy
The biggest planning mistake is buying a multi-camera bundle before confirming the map. Bundles are useful only when your zone plan already shows similar camera jobs across multiple locations. If your zones are mixed, a one-size bundle can create overlap in easy areas and blind spots in critical ones.
Another common issue is ignoring seasonal lighting. A zone that looks perfect at noon may fail at dusk because of headlight glare, porch reflections, or tree shadows. During planning, validate each outdoor angle using at least two time windows, such as late afternoon and evening.
Storage planning is also often too optimistic. Homeowners often plan for normal traffic, but real incidents tend to arrive in clusters. Delivery bursts, guests, weather events, and holiday traffic can temporarily increase events and storage use. Build your retention and export policy around peak weeks, not calm weeks.
Finally, do not treat camera placement as independent from doorbell and lock events. If these systems are not visually aligned, reviewing an incident becomes slow and uncertain. Keep at least one clear path from approach to entry action to indoor movement, so your footage tells one coherent story.
Example planning blueprint for a typical home
Here is a planning-first sample you can adapt:
• Front door zone: one door-focused camera plus one approach-path angle
• Driveway zone: one wide overview plus optional detail-focused angle near garage path
• Backyard zone: one gate-crossing angle and one patio/activity angle if needed
• Indoor transition zone: one entry hall or living-room transition view
• Stair or hallway continuity: one optional camera for multi-floor movement clarity
After confirming zone roles, you can test an indoor-outdoor model such as eufyCam C35 Add-On Camera for mixed-use placement.
Conclusion
The best-performing setup is rarely the one with the highest spec sheet. It is the one with the cleanest coverage logic. Start by mapping movement, ranking zones, and defining what each view must prove. Then select camera types and quantity to match those decisions.
That process gives you a home security camera system that is easier to trust, easier to scale, and less likely to leave blind spots you only notice after an incident.


